War in the North Osgiliath Challenge Guide
Plan a safer Osgiliath challenge run: confirm its historical Sarn Ford unlock, assign each hero a lane, protect resources, and log Legacy Edition results.
What this guide can confirm
Osgiliath is one of the two historical challenge maps unlocked at Sarn Ford, alongside Lorien. The original manual says challenge maps become available from the Map tab once unlocked, and that leaving an unfinished run means beginning again. That is useful for planning a test run: enter with one question, finish or deliberately reset, then change only one condition on the next attempt.
This is not a claim that every old reward, wave count, route marker, or multiplayer behavior is unchanged in Legacy Edition. Historical community guides disagree about several of those details. Treat the map as a repeatable pressure test until current-version footage or direct testing confirms more.
Osgiliath run card
| Before launch | What “ready” looks like | Why it matters |
|---|---|---|
| Farin holds a collision point | A shield or heavy weapon route with one repeatable defensive or area answer | The group needs someone who can keep an enemy push away from an objective or revive lane |
| Eradan owns the first exposed threat | A bow, enough arrows for the opening pressure, and a route back behind cover | The ranged hero should remove the unit that forces Farin to abandon the lane |
| Andriel keeps a reset window | Sanctuary-style protection or recovery with Power still available | The first support action should save a real collapse, not merely erase minor chip damage |
| The party names one retreat line | Everyone knows where to regroup before the pull begins | A good tactic fails when all three heroes run in different directions |
| The host records a baseline | Difficulty, hero levels, one equipped item per player, and save state | The record makes a failed run useful and helps with current persistence checks |
If you are playing solo, use the same roles in sequence: Eradan opens a safe angle, Farin absorbs the collision, and Andriel enters when protection changes the outcome. The goal is not to switch constantly; it is to enter each switch with a job already chosen.
The three-lane discipline
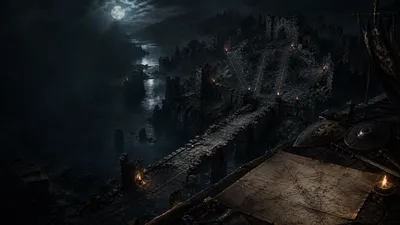
The cover art on this page is an original tactical illustration, not a copied map layout. Use its three marked lanes as a simple communication model for the historical challenge: mark, hold, and recover.
1. Mark — Eradan creates the first safe decision
Start by identifying the enemy that takes space away from the party: a ranged unit, caster, or exposed elite. Eradan’s job is not to win a private damage race; it is to make Farin’s first position safer. A charged Heavy Shot or other reliable bow action is useful only when it can be repeated without spending all arrows or Power before the next urgent target.
If you need to leave the angle, use Evasion to reset it. Do not turn the melee fallback into a second full build just because the first contact was messy. The Eradan build route explains how to test the bow, rescue, and close-range lanes separately.
2. Hold — Farin makes a revive lane exist
Farin’s first question is whether the group can return to one defensible point after contact. War-cry is the role-first starting lane when attention, disruption, or a safer revive window is missing. Add Sweeping Attack when a stacked push makes the room unreadable; reserve Crushing Blow for a party that already survives long enough to capitalise on a heavier commitment.
The historical sources support Farin’s shield, heavy-weapon, and crossbow eligibility. They do not prove which current Legacy Edition setup has the best damage. Use the Farin build route to choose the tool that protects the failure you actually saw.
3. Recover — Andriel stops one error from becoming a wipe
Andriel should preserve a support action for the moment a lane fails, a player goes down, or an objective is exposed. Sanctuary is the durable first commitment when the party lacks a safe recovery window. Word of Command helps when one dangerous unit must become focusable; Empowered Staff is a later route once the support loop is already repeatable.
Call the timing before spending it. A defensive action that overlaps Farin’s own emergency tool may look powerful in a clip but leave the next true collapse uncovered. The Andriel build route keeps those three jobs separate.
What to test on the first attempt
Old community routes sometimes describe using the centre or a narrow approach to turn a wide fight into a single line. That can be a useful historical route hypothesis, not a fixed Legacy Edition instruction. Test it with a small run sheet instead of copying an old wave script:
| Test | Pass condition | Change next time if it fails |
|---|---|---|
| First ranged target | It falls or loses pressure before the frontline breaks position | Adjust Eradan’s opening angle or ammo/Power check |
| Collision point | Farin can hold without consuming every emergency tool | Use a shield/control lane or reduce the pull |
| Support timing | Andriel still has a reset button when the first real collapse begins | Save the protection action or move the group closer together |
| Resource loop | At least one primary action remains available after the first hard exchange | Fix the resource that is empty first, not every tree at once |
| Recovery path | A downed ally can be reached without abandoning the objective | Reassign the anchor, the flank, or the retreat line |
Do not record a claimed total number of waves as proof of completion. Historical sources conflict on that number. A current Legacy test should instead note the platform, difficulty, map prompt, completion screen, save state, and any visible reward before it becomes a site-wide claim.
After the run: a 90-second ledger
- Write down the first failure, not just the final wipe. It tells you which role to change.
- Record arrows, bolts, Power, and potions at that moment. An unavailable action is a different problem from an ineffective action.
- Note whether Farin left the objective, Eradan lost a safe angle, or Andriel spent the reset window too early.
- In co-op, return to a hub and confirm one equipped item per player after the save indicator. This is a sensible evidence step while multiplayer progression reports are still being investigated.
That loop is more valuable than a vague “best Osgiliath build.” It gives you a repeatable way to make the existing Builds hub more specific to your party and platform.
Sources and evidence boundary
- Warner Bros. original manual — historical Sarn Ford unlock, Map-tab challenge access, restart condition, hero roles, trees, and equipment rules.
- Historical GameFAQs guide — original-route terminology and challenge context only.
- Challenge missions and difficulty — the broader Osgiliath, Lorien, and difficulty readiness page.
The exact Legacy Edition wave behavior, rewards, cooldown values, and platform stability remain intentionally unranked until they can be directly verified.
Recommended guide route
Sources & verification
Open the evidence used for this guide. Community reports are not official patch notes.
- Evidence
- Evidence: Partial
- Checked
- Checked: 8/25/2026