War in the North Legacy Edition Complete Story Walkthrough
A source-labelled campaign route: historical chapter handoffs, completion checks, and clear Legacy Edition verification boundaries for every journey north.
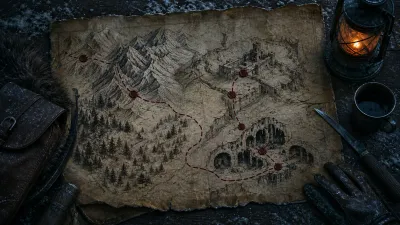
Use this as a campaign handoff map
This is the route to use when you want to finish the story without treating a 2011 walkthrough as an unverified Legacy Edition patch note. The chapter order, named hubs, and old completion handoffs below are Historical / Original Version material cross-checked against original guides and the original manual. The current product listing verifies the Legacy Edition’s Agandaûr story, three heroes, Beleram, and several named Middle-earth locations—but it does not publish a scene-by-scene campaign route.
What to do first: use the route table to know what your next historical handoff should be, finish the relevant hub tasks before travelling, and compare the objective text shown in your current game before relying on an old trigger or collectible location.
| Evidence label | This page uses it for | This page will not claim |
|---|---|---|
| Verified in Legacy Edition | Current product identity, three heroes, Beleram, co-op/switching context, 46 current Steam achievements | That every old checkpoint, boss phase, save trigger, or quest reward is unchanged |
| Historical / Original Version | Campaign order, hub handoffs, named route beats, original side-quest context | A current Legacy Edition map marker, timer, hidden item location, or achievement trigger |
| Editorial completion check | The before-travel and after-chapter routines | A reproduced current save or multiplayer test |
The route in one screen
| Historical campaign handoff | Main route cue | Finish before you move on | Current-version check |
|---|---|---|---|
| Bree → Fornost | Begin the northern expedition; free Beleram; push through the city and defeat Tharzog | Resolve any Bree conversations and note your active side-quest counters | Confirm the displayed objective and your platform’s current save flow before leaving the first hub |
| Sarn Ford → Barrow-downs | Take the Ranger-camp handoff, search for the missing Rangers, and continue to Rivendell | Keep the Barrow-downs collection and side-quest counters visible before you leave the region | Verify the current map label and route prompt; do not assume an old secret location is unchanged |
| Rivendell → Ettenmoors | Take the hub quests, complete the Ettenmoors route, and return after Bargrisar | Hand in what the current journal marks complete before accepting the next mountain trip | Compare the actual quest-log wording with the historical names below |
| Mount Gundabad → Nordinbad | Reach the Dwarven stronghold, protect Nordri’s activation, then reach Nordinbad | Re-equip and resolve visible turn-ins at the new hub | Check that the next story destination is unlocked in your current map |
| Nordinbad → Mirkwood | Follow the rescue and Radagast route through Mirkwood | Recheck side paths, active requests, and any collection counter before the next major travel step | Treat old NPC and item locations as historical until you see them in your build |
| Grey Mountains → Siege → Carn Dûm | Reach Urgost’s lair, return for the siege, then finish the Agandaûr route | Complete the journal items you are still able to turn in before the final commitment | Use the current objective and achievement list; do not rely on an old boss/checkpoint exploit |
What the Legacy Edition product page actually confirms
The current Steam listing confirms that the Legacy Edition follows the northern threat led by Agandaûr, uses Eradan, Andriel, and Farin, and includes Beleram. It also names Rivendell, Lórien, the Lonely Mountain, and Mirkwood among the journey’s locations. The listing supports a current three-hero setup with hot-swapping and co-op; it is not a substitute for the historical route sources.
That distinction matters. A route page becomes more useful when it tells you where its certainty stops rather than making every old line read like a freshly verified checkpoint.
Completion-safe loop for every hub
Use this four-step loop before every travel commitment. It is deliberately simple because it works whether you are solo, using current hero switching, or playing with friends.
- Read the current journal, not the old guide first. Mark the displayed main objective and every side quest that has a current turn-in or counter.
- Speak and hand in before travel. Historical routes contain several hub-specific conversations and smith/collection exchanges. Complete the items your current journal shows before choosing the next destination.
- Set the party job. Give Farin the room-holding task, Eradan the pressure-target task, and Andriel the recovery/control task. Use the character tree overview if your current party setup has drifted.
- Record one mismatch. If the map name, objective wording, or handoff differs from the historical entry, follow the live game and treat the old detail as unverified. Do not force the route to match an old screenshot.
Chapter handoff cards
1. Fornost — open the road north
Historical / Original Version route: Aragorn sends the party north to distract the enemy force at Fornost. The route passes through the city and underground areas, frees Beleram, reunites the party with Elladan and Elrohir, includes a defense sequence, and ends with Tharzog before the Sarn Ford handoff.
Before you leave: finish visible Bree conversations, inspect active requests such as Rowlie’s Gift, Forewarned is Forearmed, and Otto’s Arsenal if they appear in your current journal, and keep any collection counter visible. The old route places Tedder Hedgerow’s riddle wager at the Prancing Pony; treat that location and reward as historical context, not a current guarantee.
Next-page handoff: use the chapter objectives checklist for a shorter current-screen reference, and the side-quest checklist when a counter needs a named hand-in.
2. Sarn Ford and the Barrow-downs — clear the tomb route
Historical / Original Version route: at Sarn Ford, the party receives the missing-Rangers and Athelas context, then searches the Barrow-downs, follows the signs of Luin and Kilaran, clears the Last Sons of Cardolan sequence, defeats the Barrow-wight Lord, and continues to Rivendell.
Before you leave: historical guides treat breakables, tomb rooms, and Westernesse collection progress as easy to lose track of. Clear the routes your current map exposes, then look at the real counter before deciding whether a replay is needed. Do not claim a fixed drop location from a historical guide.
Current-version check: confirm the current quest title and map icon at Sarn Ford. The original manual describes challenge content opening around this point, but the current Legacy UI and unlock wording are covered separately in Challenge Missions: Osgiliath & Lórien.
3. Rivendell and the Ettenmoors — turn in before the mountain
Historical / Original Version route: Rivendell is a major conversation and turn-in hub. Original routes associate quests with Angmir, Bilbo, and Arwen, then send the party through Coldfells, High Moors, and Stone Chasm to Bargrisar before the return to Rivendell.
Before you leave: look for current journal turn-ins first; then equip for the problem that actually stopped the party. If the group struggles to hold an opening, start with the Farin build. If distant pressure forced every retreat, use the Eradan build.
Historical achievement note: original routes associate a conversation with Frodo with the Friend to the Ring-bearer path. The current Steam page confirms that Legacy Edition has 46 achievements, but it does not verify that original trigger. Use the achievement roadmap as a boundary-aware companion rather than assuming the old condition pops unchanged.
4. Mount Gundabad — protect the activation handoff
Historical / Original Version route: travel through the Alpine Pass and Gundabad, find the Dwarven objective, protect Nordri’s ancient-weapon activation, and continue to Nordinbad after the rescue sequence.
How to play the handoff: this is a party-role checkpoint, not a request for a fabricated wave count. Keep Farin at the objective, let Eradan remove the threat that prevents the hold, and save recovery/control for the moment the formation breaks. For a current combat decision rather than an old route description, use Bosses and Encounter Tactics.
Current-version check: after the arrival, confirm the live map shows Nordinbad as the usable hub and read the next displayed objective before selling or travelling.
5. Nordinbad and Mirkwood — do not skip the return loop
Historical / Original Version route: Nordinbad functions as the later Dwarven hub. Historical guides then send the party through Mirkwood, including Wulfrun, Beleram’s route, Radagast’s staff, optional rescue/collection work, and the Saenathra encounter.
Before you leave: resolve the visible hub requests, check whether a smith or collection item still has a current destination, and scan the routes your map opens before the final arena. The historical quest names are useful prompts for your journal, not a promise that every route branch or item position is identical.
Current-version check: if a quest counter or co-op progression display looks wrong, preserve the current journal state and follow the targeted progress-saving guide rather than re-running a whole chapter from an old walkthrough assumption.
6. Grey Mountains, the Siege, and Carn Dûm — finish the live objective, not an old exploit
Historical / Original Version route: Radagast points to Urgost’s lair in the Grey Mountains. The historical sequence returns to Nordinbad for the siege, then moves through the Agandaûr endgame and Carn Dûm. Some old indexes divide the return and final assault differently; this page keeps both search names visible instead of pretending that one historical chapter label is the only current label.
Before the final commitment: turn in whatever the current journal still permits, inspect your equipment, and save through the platform’s real flow. Do not depend on an old checkpoint timing, reward, boss weakness, or achievement exploit.
Current-version check: the current Steam achievement list confirms a 46-achievement Legacy set, including completion categories. It does not validate every historical achievement trigger, so use it to verify the live label—not to rewrite an old condition as fact.
If the route and your game disagree
Follow your game. The priority order is: current objective text → current map destination → current journal counter → historical route context. A discrepancy is useful evidence that a Legacy-specific check is needed; it is not proof that your save is broken.
For systems that are explicitly edition-sensitive, start with Legacy Edition vs Original. For secrets and counters, use Collectibles, Scrolls, and Secrets alongside the relevant chapter—not after the whole campaign is complete.
Source boundary
The historical campaign material is cross-checked against GameFAQs’ original quest route, its walkthrough index, and an independent Gamepressure side-quest reference. The edition-specific product facts come from the current Steam listing and current Steam achievement data listed in the page source ledger.
No fixed Legacy Edition save trigger, hidden-item coordinate, boss statistic, wave count, or reward is claimed here without current verification.
Recommended guide route
Sources & verification
Open the evidence used for this guide. Community reports are not official patch notes.
- Evidence
- Evidence: Partial
- Checked
- Checked: 8/25/2026